maanantai 23. tammikuuta 2017

Prinsess semla, prinsessapulla - a combo of a bun and princess cake

The winter time delicacies of Finland include a laskiaispulla. Essentially, a bun filled with either marzipan (the only right way ;) ) or jam and topped with whipped cream.The same bun is eaten in Sweden too, the home for Princess Cake, a lovely sponge cake filled with strawberry jam, cream mousse and whipped cream and topped of with green marzipan. Absolutely divine.

The Swedes, always being a bit better than us Finns, have now found a way to combine these two. Thimons bakery did it. On their Instagram account you can see a video of how the buns are done.

And the result is heavenly. And so pretty. And now - also glutenfree. :)


You will need: pulla (buns), whipped cream, marzipan (and a tiny amount of milk), green (and pink) marzipan and if you like, a bit of strawberry jam.

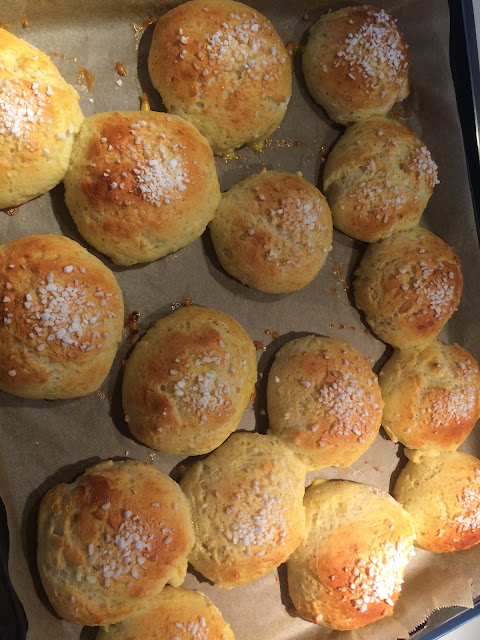
You can find my pulla recipe here . But for your convenience, it can be found at the bottom of this page, too (without the saffron mentioned in the original recipe.)

FILLING
250 g almond paste
2 tbsp milk

Grate the almond paste, pour into a bowl, add the milk and beat even with an electric mixer.

METHOD
Take out your green marzipan and roll it flat with icing sugar. Place the marzipan sheet on top of your bun, try to ease out most of the crinckles. Cut off the excess marzipan around the bun, leaving about 1 cm everywhere so taht you can press the ends underneath the bun.

Cut the top off. Add a good dose of the almond paste filling, pipe a generous amount of whipped cream, add an optional squirt of starwberry jam, replace the lid. Almost done now! For extra pretties, add pink marzipan flowers as ornaments and sprinkle with some icing sugar.

Almost (!) too pretty to eat. :)


PULLA (BUN) RECIPE

Ingredients:
5 dl milk, at around 45 degrees Celsius
2 tsp Psyllium
½ tsp salt
2 dl sugar
1 tbsp ground cardamom
2 eggs
2 dl flour (gluten-free mix)
5 + 2 dl of rice flour
2 bags of yeast


Method:
Heat the milk up to about 45 degrees Celsius. It needs to be hotter than your hand, because it will sit for a while until the yeast is added. Add the salt, sugar, cardamom and psyllium and whisk shortly with an electric mixer. Leave to sit (and swell) for about 2 minutes, whisk again and give it another 2 minutes.

In the meantime, mix together the rice flour and yeast. To the milk, add the eggs, whisking well. Add the yeat and rice flour, mix well. Finally, add the gluten free flour mix a spoonful at a time until the consistency is right.  Whisk well, for at least 3 minutes. Then, let the dough stand (and swell) for about 10 minutes.

Then, flour your hands and scoop out the dough. It will be a bit looser than a standard dough, but you should be able to manage it in your hands nonetheless. Gently roll them into balls in your hands, place them on a lined baking tray. You will probably need to flour your hands before each rolling session.

Cover the rolls/buns with a cloth and let them rise for about 30-40 minutes.
Before placing the rolls in the oven, gently brush them with a lightly mixed egg and sprinkle with sugar.

Bake at 200 degrees Celsius, for about 12 minutes, until nice and golden brown.

This recipe will make about 15 rolls.


tiistai 1. marraskuuta 2016

Feed the birds, tuppence a bag

Last weekend I baked doughnuts and as after deep frying anything, there is always the hassle of getting rid of the used oil.But now that winter is nearing in, I decided to put the oil to good use - and make it into bird feed.


I used coconut oil for the frying. After the doughnut frying, there was a lot of dough residue in the pan.


 I cleared the cabinets from old or near expiry date nuts and seeds and found some pumpkin seeds, sesame seeds and macadamia nuts which I chucked into the oil along with some rolled oats.

Careful though! You need to let the oil cool down a little before throwing anything in, otherwise you will end up with deep fried nuts. :)


 I cut open some milk and juice cartons.


Out of the top piece, I cut out a square and punched a hole through it.


 Through the hole, I added a wool thread and tied a big knot to go underneath the square. 


 I placed the square to the bottom of the carton, and poured in the oil and seed mixture.


Once ready, I placed the carton outside to chill completely. And on top of the carton, I placed a skewer so that I could wrap the thread around it and keep the thread inside the oil mixture somewhat straight.


The coconut oil sets quite quickly, but it wasn´t until the next day that I cut off the carton from around the seed block and hung the bird feed "candle" to the tree. 


The birds have been quite keen on the seed candle, but as I am no bird expert, I am not completely sure if sesame seeds are good for birds. (I do not know why they wouldn´t be, but don´t take my word for it.)

Also, in hindsight, I think I should have added some other oil into the mixture, too.  Perhaps the coconut oil will be too hard for the birds in the wintertime? So maybe a splash of olive oil or similar would keep it softer? Do try - and report back! :)

Happy week to everyone!


sunnuntai 16. lokakuuta 2016

Autumn crafts - dream catchers

Last weekend I went to the woods, ie. our back yard, with my daughter.

We collected a bunch of twigs, mosses and lichen, cones, blueberry stalks and other pretty autumn goodies. The mosses and other ornaments went into another use, more of which later, but the twigs were turned into homemade dream catcher type of decorations.


First, I cut the twigs into smae length pieces and tied them together with some wool yarn.


I also added a yarn to one of the tips of the triangle for hanging it later on.


 I twined in some yarn for decoration.


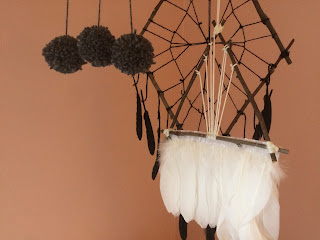
 Altogether, I made 3 catchers. For a square / harlequin shape I needed 4 twigs.


After securing the corners, I started to add loops of yarn on all sides.


 I continued to add loops in the previous loops until I had a kind of a web.


 For the grey version, I added pom poms made of the same coloured yarn. (This project is a really good way to get rid of small amounts of yarn, by the way.)


A day later, I added the last one, a white triangle.


And now they all hang in the corner of our living room extension.


This was such a simple and nice project. The feathers, if you choose to use any, cost something, but for example a bag of approximately 50 duck feathers (the small balck ones here) cost around 2 euros on eBay. For the decor, you can use pom poms, cones, crystals or just smaller twigs so this really is a low cost project.

Also, fun to do with the kids. My 2nd grader needed only help for cutting the twigs, everyhting else she did on her own. And it resulted in a very boho, colourful dream catcher.


Lovely autumn to you all!


tiistai 20. syyskuuta 2016

Ikea Christmas 2016

For once, the weather in Finland is quite nice - for a September, that is. Summer weather was bad, but for some reason it has been a warm August and September. Today, even the sun is shining. Regardless, the winter is approaching. And Ikea knows it.

Christmas 2016 by Ikea:


All photos from: http://www.ikea.com/us/en/catalog/categories/seasonal/winter_holidays/

perjantai 7. elokuuta 2015

Schultüte - school cone

I was an au pair in Germany, Tübingen, over 10 years ago. I flew over in autumn and shortly after my arrival, the older girl of the family began her school as a first-grader. That was the first time I ever realised the concept of a Schultüte.

I had visited Germany many times during the summer months and always admired the pretty and colourful cardboard cones I saw at Müller for example. I never knew what they were for until I saw the small 6 and 7 year olds with their oversized backpacks, clinging to their cones.

It was such an adorable idea that I decided that I would make one for my child when the time came. And now it has.

The idea of a Schultüte is to do what people everywhere do when their children start school; to equip them with the goods they need. But somehow I like the idea of handing out all the items as a colourful, prettily wrapped gift. I have made one before to our neighbour girl when she started school but now I got to do the same to my own daughter.


A dvd for fun.


A small flashlight for the dark winter mornings when she will be walking to the bus stop.


Xylitol chewing gum and xylitol pastils to keep her teeth healthy.


Notebooks of various sizes.


Magnets. 


Pencils and a pen sharpener.


Stickers that glow in the dark - an essential part of any school year.


Scented crayons (did you not just love the scented erasers and stuff back in the day??) and some markers.


Initial.


 In Finland, there are no tütes and making one did not seem like a good idea. So I bought a pretty Marimekko gift bag instead.


I hope she likes her Schultüte. (I will decorate the bag later on.)

I hope her school years will be a safe and happy time.